
A document approval that waits in someone’s inbox for a week does not usually look dramatic. No system is down. No one is shouting. The work just sits there while someone sends a reminder, checks whether the attachment is the newest version, asks who has authority to approve it, and then forwards the signed file to the next person.
That is why the Moneytree example is a useful place to start. By using a simple notification automation, Moneytree cut approval cycles from seven days to one day, according to Wrike’s document workflow automation guide.[1] The important part is not that the company “transformed work.” The important part is smaller and more useful: the team removed waiting time from a repeatable approval path.

That is the right scale for most small teams starting with document workflow automation. Do not begin with every document your company touches. Begin with one recurring document path where people already know the pain: approvals, intake forms, proposals, contracts, invoices, onboarding packets, compliance acknowledgments, or client files.
For this guide, document workflow automation means using software to move a document-related process forward without someone manually chasing every step. A trigger starts the flow. A document or form supplies the information. A rule sends it to the right person. A notification asks for action. The completed file lands somewhere findable. That is different from buying a full enterprise document management system, launching a company-wide BPM program, or asking AI to “handle paperwork” without a clear path to inspect.
If you want the deeper boundary between workflow automation and business process management, this BPM vs. workflow automation decision guide is a better place to park that question. Here, the goal is more immediate: pick one document workflow and make it stop leaking time.
The Five-Step Flow
The setup path is simple enough to keep on one page, even if the actual work takes a few focused sessions.
| Step | What You Decide | Output |
|---|---|---|
| 1. Audit | Which recurring document workflow is painful enough and safe enough to automate first | One selected workflow |
| 2. Map | What triggers the workflow, who touches it, where decisions happen, and where the final file lives | A visible process map |
| 3. Choose | Which no-code tool can connect the document source, approval step, storage location, and notifications | A short tool decision |
| 4. Build | How the first automation will route, notify, collect approvals, and handle exceptions | A tested pilot workflow |
| 5. Iterate | What to improve after real use, and what not to automate yet | A stable workflow with an owner |
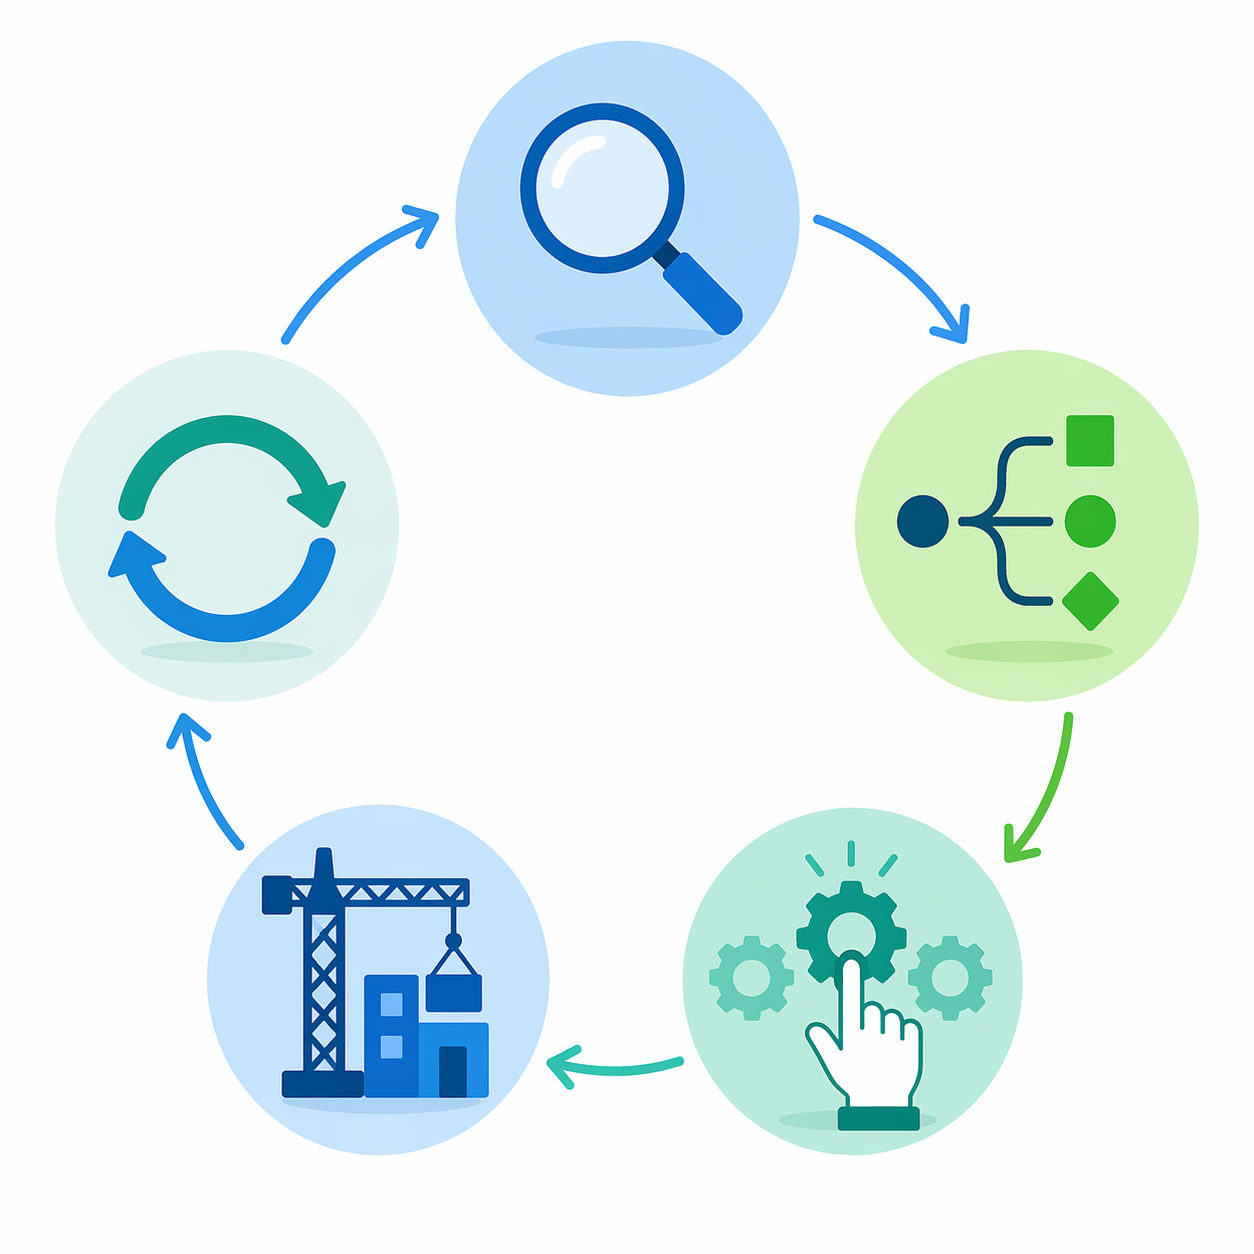
The first two steps matter more than teams expect. A no-code tool can connect apps quickly, but it cannot guess which version of a document is authoritative, whether a manager or client should approve first, or what should happen when a required field is blank.
Step 1: Audit for One Workflow Worth Automating
Start with the workflow people complain about in specific verbs: “I resend,” “I rename,” “I copy this into the spreadsheet,” “I ask Legal again,” “I move the PDF to the client folder,” “I check whether Finance approved it.” Those verbs are usually where automation can remove handwork without needing a strategy deck.
A good first candidate has four traits. It repeats often. It follows mostly predictable rules. It involves documents or form fields that can be standardized. It causes visible delay, errors, or follow-up when handled manually.
- Better first workflow: a client intake form that creates a folder, notifies the account lead, and routes a completed packet for review.
- Better first workflow: a proposal approval where dollar amount or client type determines who signs off.
- Better first workflow: a contract status update that alerts the requester when a signed version is uploaded.
- Riskier first workflow: a rare exception-heavy process where every document needs a different decision path.
- Riskier first workflow: a process no one owns, where several people disagree about what the current rule is.
Do not start with the workflow that sounds most impressive. Start with the one where a small routing or notification change would make tomorrow easier. Moneytree’s result matters because the improvement came from compressing an approval cycle, not from rebuilding every document process at once.[1]
Use a Short Audit, Not a Month-Long Discovery Project
For a small team, a useful audit can fit into a shared document or spreadsheet. Ask each person who touches the workflow to describe what they do, what they wait for, and what they fix after the fact. Keep the language plain. “Upload final PDF to Drive” is more useful than “document repository transition.”
| Audit Question | Why It Matters |
|---|---|
| What starts the workflow? | You need a trigger before you can automate anything. |
| Where does the document come from? | The source determines whether the automation watches a form, inbox, folder, CRM, or e-signature tool. |
| Who must review or approve it? | Approval ownership needs to be explicit before routing can be trusted. |
| Which fields decide the next step? | Amount, client type, region, department, or risk level often control routing. |
| What usually goes wrong? | Missing fields, wrong files, stale versions, and silent delays are the best places to add guardrails. |
| Where should the final version live? | A workflow is not finished if no one knows where to find the signed or approved file. |
This is also where data accuracy deserves attention. Rossum’s 2026 trends report found that 61.6% of finance leaders in its survey ranked improving data accuracy as their top priority, and 54.2% still relied on legacy OCR.[2] That does not prove every small team has the same finance-document problem. It does show why document automation should not be judged only by speed. If the automation moves a bad field faster, the cleanup simply moves downstream.
Step 2: Map the Workflow Before You Touch a Tool
The map does not need special notation. It needs to be honest. Put the document at the center and trace what happens from the first trigger to the final stored version. If the current path has three side conversations in Slack, two email reminders, and one person who “just knows” which folder to use, put those on the map.
For a first pass, write the workflow as a sequence of events:
- A request arrives through a form, email, CRM record, or shared folder.
- Someone checks whether the required fields and documents are present.
- The document goes to the first reviewer or approver.
- A decision point changes the route, such as approve, reject, request changes, or escalate.
- The approved document is renamed, stored, shared, or logged.
- The requester, client, or internal team receives a status update.
Then mark the decision points. These are the spots where a no-code automation needs rules, not vibes. If a proposal under a certain threshold goes to one manager and a larger one goes to the founder, write that as a rule. If client-facing documents need review before internal filing, write the order. If a missing W-9 stops an onboarding packet, mark the stop.
The trigger is the most important line on the map. A trigger can be a submitted form, a new file in a folder, a signed envelope in an e-signature app, a new row in a spreadsheet, a status change in a project tool, or a tagged email. If you cannot name the trigger, the workflow is not ready to automate.
Mark the Fallback Before the Happy Path
A clean map includes the fallback: what happens when the automation cannot continue. That might mean a required field is empty, the approver is out, the file type is wrong, the client uploads the wrong document, or two matching records exist.
For a small team, the fallback can be simple. Send the item to a review queue. Notify the workflow owner. Add a status such as “Needs manual check.” Do not let a failed automation disappear silently, and do not make every exception everyone’s problem.
Step 3: Choose the Simplest No-Code Path That Covers the Whole Loop
Tool selection should come after the map, not before it. Otherwise the team ends up asking whether a product is powerful in general instead of whether it can handle this particular trigger, document source, approval route, notification, storage location, and fallback.
For a first document workflow automation, you usually need some combination of these components:
- A form, inbox, folder, CRM, or document tool that can start the workflow.
- A place to store structured fields, such as a table, database, CRM record, or project item.
- A routing rule that sends the document to the right reviewer or approver.
- A notification channel people actually check, such as email, Slack, Teams, or the project tool itself.
- A final storage location where the approved or signed version is easy to find.
- An error path that alerts one owner when the workflow stalls.
You may be able to build this inside a single product if your team already uses an approval workflow tool, project management platform, form builder, or document system. If not, connector tools such as Zapier, Make, or similar no-code platforms can bridge the apps you already use. For a broader comparison, see Workflow Automation Tools: How to Choose the Right Platform for Your Use Case and Skill Level.
If your decision is specifically between small-team document automation products, use the document workflow automation tools comparison rather than turning this setup into a feature-by-feature buying exercise. If you are comparing connector platforms, the Zapier vs. Make vs. Gumloop guide can help narrow the choice.
A Practical Tool Check
Before choosing, confirm six things in the actual product, not only on the pricing page.
- Can a non-developer create or edit the trigger?
- Can the tool read the fields that decide routing?
- Can approvers act from a place they already use?
- Can the workflow owner see run history, failures, and pending items?
- Can you test with a few documents before switching the default process?
- Can you export or recover the documents and data if the setup changes later?
The best first tool is often the one your team can troubleshoot. A sophisticated automation that only one contractor understands is not a small-team win.
Step 4: Build the First Automation in a Narrow Pilot
Build the first version around one document type and one path. If the workflow has five edge cases, leave four of them manual until the main route works. The first automation should prove that the trigger fires once, the right fields travel with the document, the right person is notified, and the final file lands where people expect it.
A simple approval automation might look like this:
| Automation Part | Example Setup |
|---|---|
| Trigger | A new proposal request form is submitted. |
| Required fields | Client name, requester, proposal amount, deadline, document link. |
| Routing rule | Standard proposals go to the department lead; exceptions go to the founder. |
| Notification | Approver receives a message with the document link and approve or request-changes options. |
| Status tracking | The record changes from “Submitted” to “In review,” then to “Approved” or “Needs changes.” |
| Final storage | The approved PDF is saved to the client folder with a consistent file name. |
| Fallback | If a required field is missing, the requester gets a correction notice and the owner sees the item in a manual review queue. |
The required fields deserve more care than the button labels. If “client name” is sometimes written as a nickname, sometimes as a legal entity, and sometimes omitted because “everyone knows,” the automation will create messy folders, mismatched records, or confusing notifications. Standardize the minimum fields before you automate the movement.
Use dropdowns where possible. Use required fields only when the process truly cannot continue without them. Give files a naming rule that a human can understand later. For example, a hypothetical naming pattern such as “ClientName_DocumentType_Date_Status” is not glamorous, but it prevents the familiar pileup of “final,” “final-v2,” and “signed-final-real.”
Test Like Someone Will Have to Clean It Up
Do not test only the happy path. Run a small batch of real or realistic documents through the automation and watch what happens. The point is not to admire that the first notification appears. The point is to catch the places where the workflow duplicates a task, sends a private file to the wrong channel, loses a field, or leaves the approver without enough context.
- Submit a complete document and confirm the full path works.
- Submit a document with a missing required field and confirm it stops visibly.
- Submit a document that should route to a different approver and confirm the rule fires correctly.
- Ask an approver to act from the notification and report what context was missing.
- Check the final storage location and file name without asking the builder where it went.
- Review the run history and confirm the owner can spot failures.
Run the pilot beside the manual process for a short period if the documents are sensitive or client-facing. That feels slower, but it gives the team a chance to compare outcomes before the automation becomes the default. Once the pilot is stable, turn off the old manual reminder path on purpose. Keeping both forever creates double work and makes no one sure which status to trust.
Step 5: Iterate After Real Use, Not During Endless Planning
After the workflow runs for a little while, review what actually happened. Look at the stalled items, skipped fields, approval delays, duplicate notifications, and manual rescues. Ask the people using it where they still had to chase, rename, explain, or correct.
The first round of improvements is usually plain: add one missing field, change one notification, clarify one approval rule, improve one file name, or add one status update. Those are good changes. They make the automation more trustworthy without turning it into a fragile machine.
Only after the first workflow is stable should you decide whether to expand. Expansion might mean adding a second document type, routing exceptions automatically, syncing status to a CRM, or connecting a reporting dashboard. If your team is beginning to need a layered setup with no-code automation plus more advanced agents or orchestration, the two-layer automation stack is a better next read.
The Over-Automation Trap
The fastest way to make people distrust document workflow automation is to automate a process nobody has agreed on. The second fastest way is to automate every exception because it is technically possible.
Small teams should leave some judgment in human hands. If a document is rare, high-risk, or politically sensitive, the better automation may be a reminder, checklist, or intake form rather than a full routing path. The goal is not to remove people from every decision. The goal is to stop using people as copy-paste engines, reminder systems, and file-location memory.
A useful rule: automate the repeatable movement, validation, notification, and storage. Be slower to automate judgment, exceptions, and ambiguous approvals. If the workflow owner cannot explain what happens when something breaks, the automation is not ready to carry the process.
What a Good First Win Looks Like
A good first win is boring in the best way. The requester submits the right information once. The approver receives a clear prompt. The status changes without someone updating a separate tracker. The final document lands in the right folder with a usable name. The owner can see what ran and what failed. Nobody has to ask, “Where is the signed version?” three days later.
Small teams do not need a full document automation program to start. They need one painful workflow, one mapped path, one no-code automation that can be tested safely, and one person responsible for watching it after launch.
Comments
Join the discussion with an anonymous comment.