
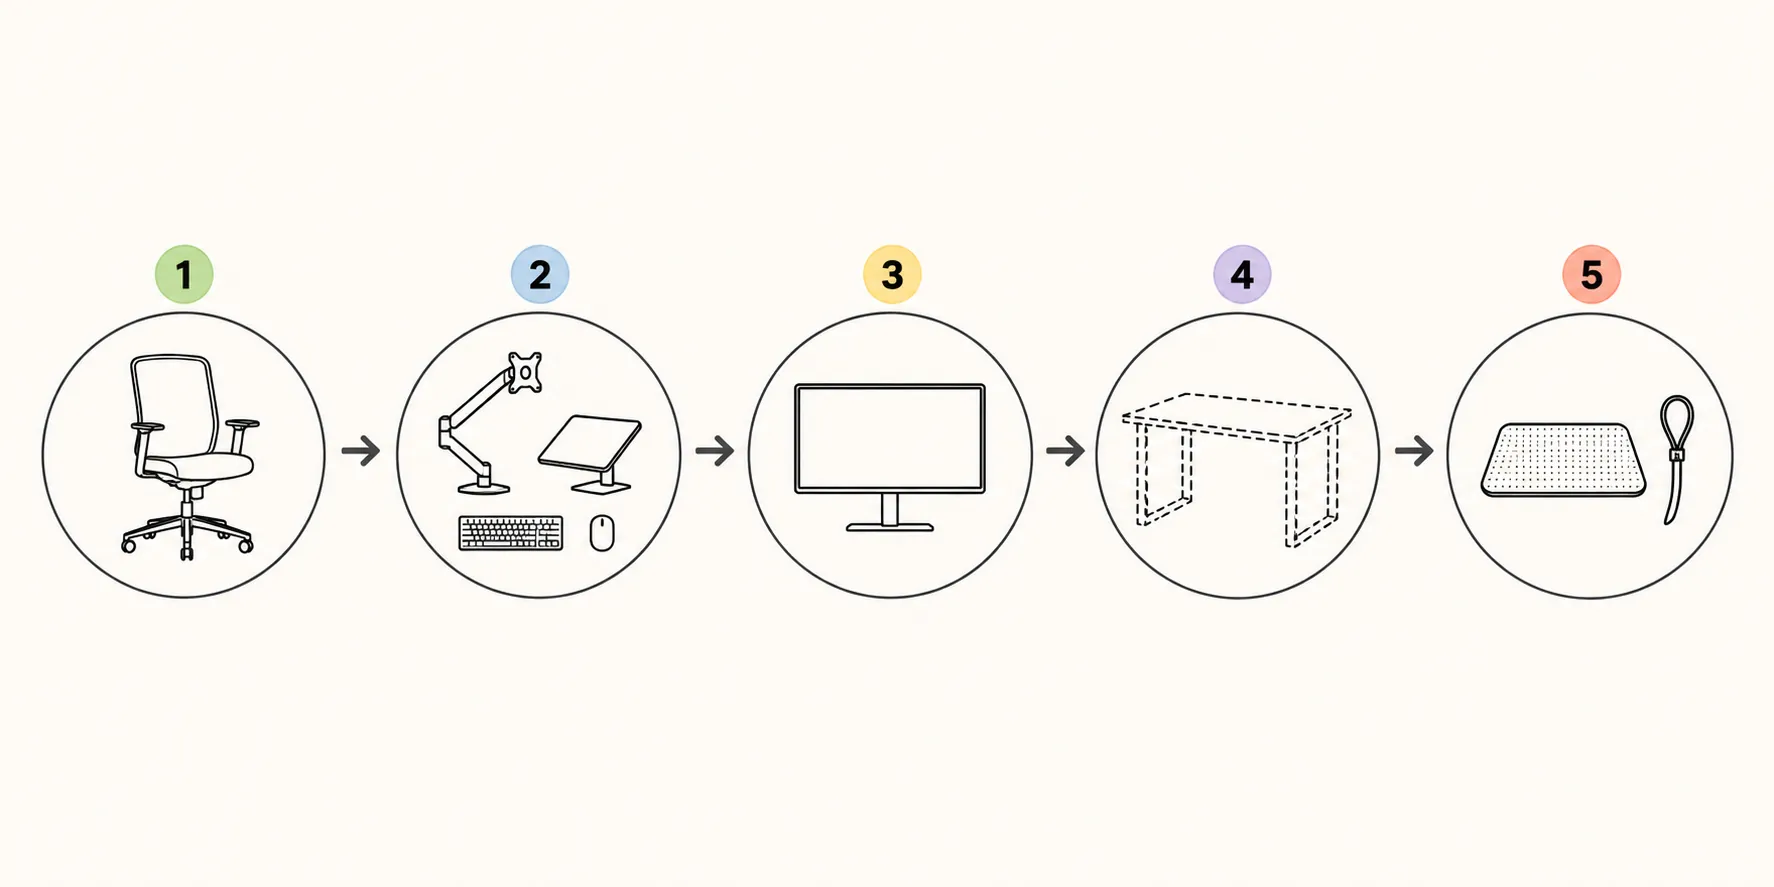
Yes: the best home office setup for small apartments on a budget can land around $400–$530, but only if the money goes in the right order. The chair and screen-height fix come before the desk. WorkstationSetup’s April 2026 build puts a five-piece setup at $372–$528, with a typical total around $434, while DeskDNA’s 2026 budget build comes in around $420; treat both as price-range evidence, not as a permanent shopping cart, because gear prices move constantly.[1][2]
| Buy order | What to solve | What to buy | What to delay or skip |
|---|---|---|---|
| 1 | Your body has to survive the workday | A real task chair that fits under the surface and lets you sit steadily | Decor, lamps, desk accessories |
| 2 | Laptop screen height and input position | Laptop stand or monitor arm, plus external keyboard and mouse | A new desk if a usable table already exists |
| 3 | Screen size, if the laptop alone is slowing you down | External monitor only if it fits the surface and ports | Dual-monitor ambitions in a narrow corner |
| 4 | The work surface | Desk only if no existing 48-inch table or counter works | Buying a cute compact desk before measuring chair clearance |
| 5 | The mess that remains | Mat, cable ties, power strip, small storage | Anything that looks nice but does not fix reach, height, or clearance |
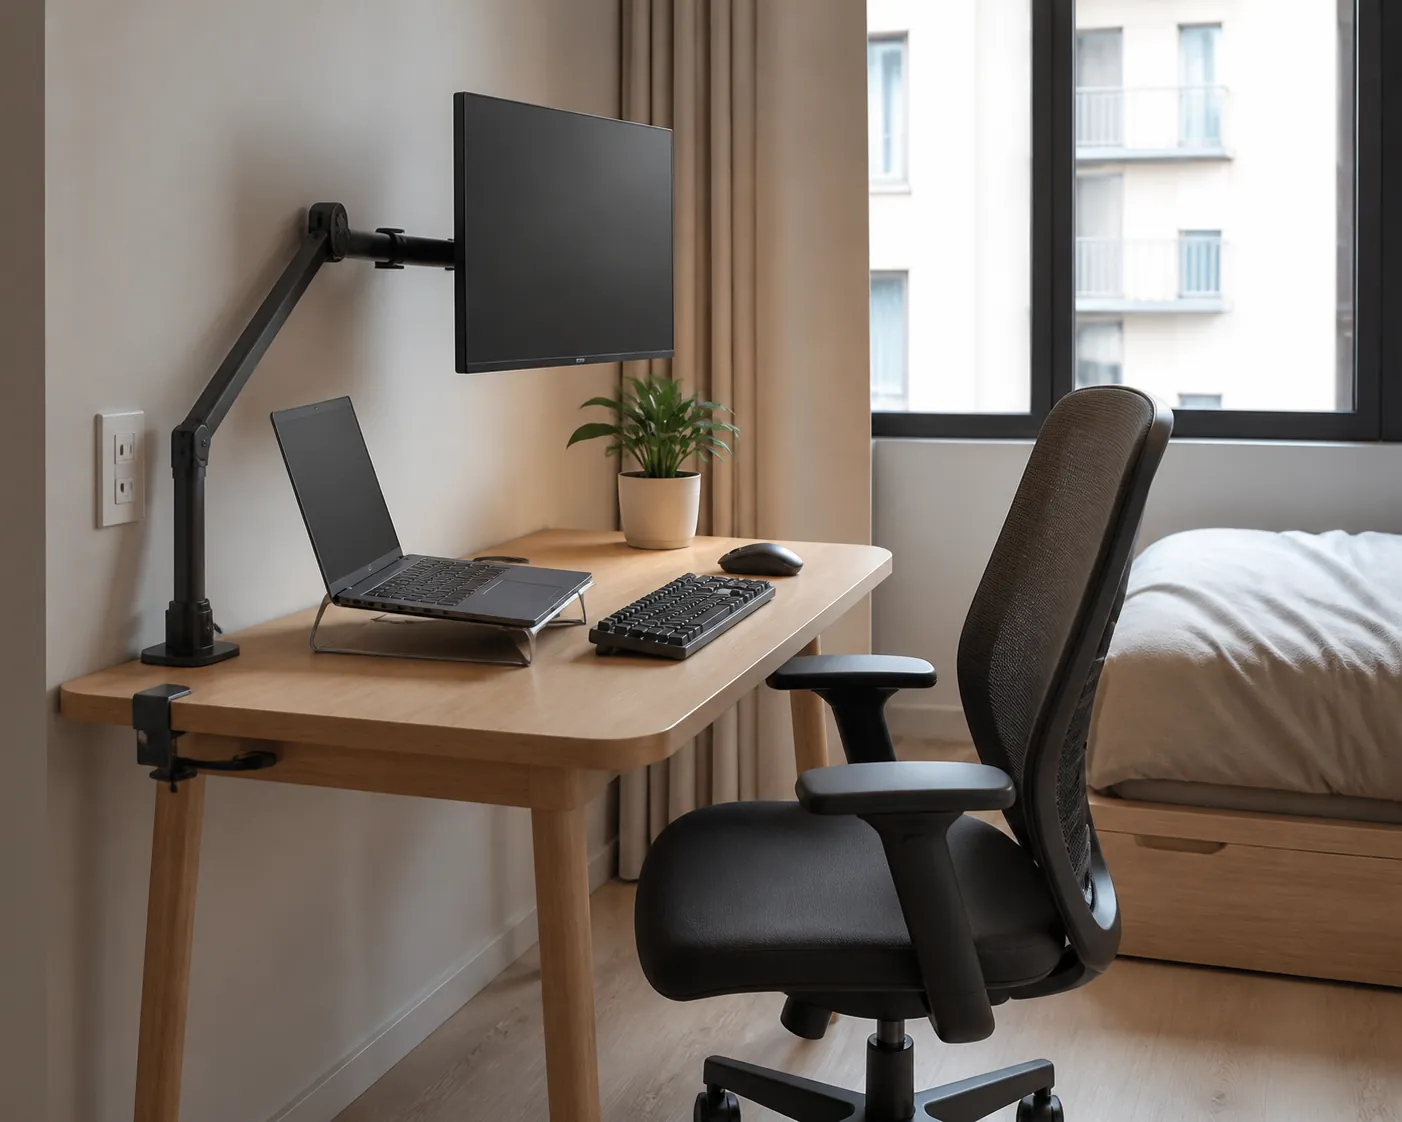
Spend first where your body and screen position fail first
A small apartment does not make laptop posture less important. It just gives you fewer places to hide a bad purchase. The first ergonomic problem is usually simple: the laptop keyboard is where your hands need to be, while the laptop screen is too low for your neck. Raising the laptop fixes the screen and ruins the keyboard position unless you add an external keyboard and mouse.
The chair belongs in that first round for the same unglamorous reason. A better screen position will not save a setup if the seat is unstable, too low, too deep, or impossible to pull back from the table. In a small rental, the chair also has to fit the surface and the clearance, not just look like an office chair in a product photo.
The standards point the money toward screen height before surface styling. OSHA’s computer workstation guidance gives a preferred viewing distance of 20–40 inches and places the top of the screen at or slightly below eye level.[3] CCOHS gives similar monitor-positioning guidance, including keeping the monitor directly in front of the user and setting the top of the screen at about eye level for most users.[4] A laptop sitting flat on a table is often 4–6 inches below that position.
That is why the cheap-but-useful fix is not a desk lamp. It is either a laptop stand with an external keyboard and mouse, or an external monitor on a clamp arm. DeskDNA’s budget method makes the same point in a blunt way: if the budget is only $100, a laptop stand plus wireless keyboard and mouse is the immediate posture fix; under a larger sub-$500 budget, it treats the external monitor as the highest-impact purchase.[2]
The monitor arm is the one small-space item that earns its enthusiasm. WorkstationSetup lists an Amazon Basics gas-spring monitor arm in the $20–$28 range versus $200-plus for an Ergotron LX, and notes that a clamp arm can reclaim 6–8 inches of desk depth.[1] That does not turn a 20-inch-deep shelf into a generous workstation. It does mean the monitor base is no longer stealing the exact patch of surface where a keyboard, notebook, or mug has to live.
- Laptop-only work: use a riser or stand, then put the keyboard and mouse on the table where your shoulders can relax.
- Monitor-plus-laptop work: put the monitor on an arm if the desk edge can accept a clamp, then use the laptop as a secondary screen only if it does not force twisting.
- No-clamp surfaces: choose a freestanding laptop stand or a wall-mounted desk solution before assuming a deeper desk is required.
Do you actually need a desk?
This is where a lot of $500 setups go wrong. A new desk feels like the beginning of the office, so it gets bought first. In a studio, that can be the worst possible first purchase: a shallow, pretty desk that cannot hold the monitor at the right distance, cannot take a clamp arm, or leaves no room for the chair to pull back.
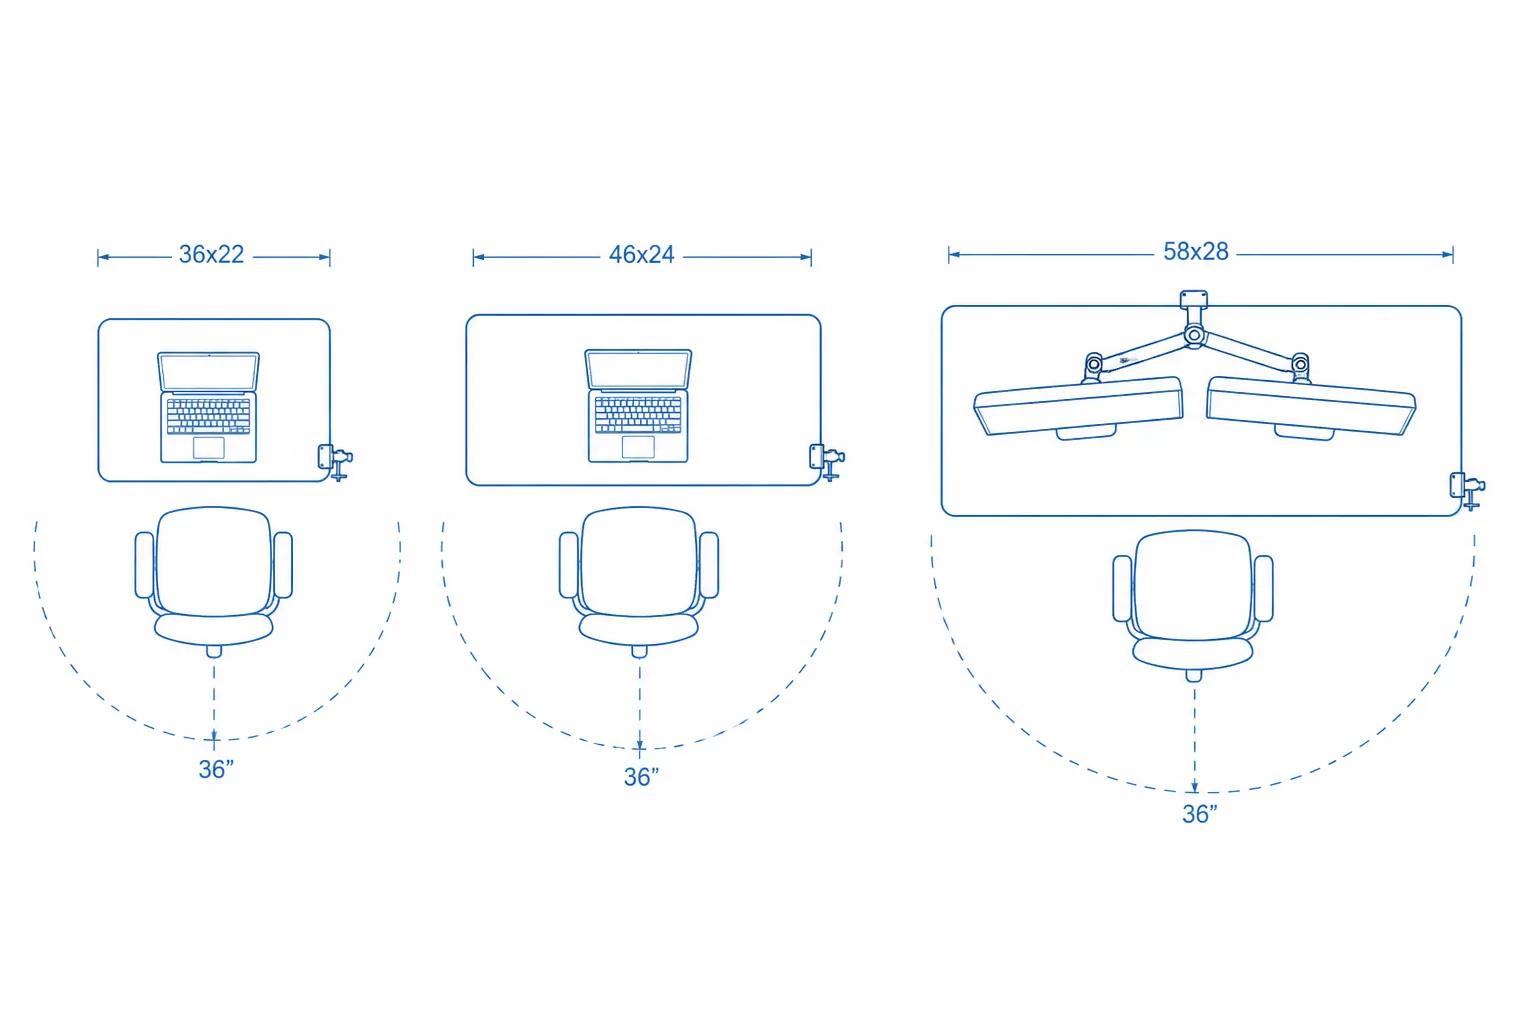
Use the footprint math before browsing. Keelan Scott’s small-space desk guide gives 36 by 22 inches as a laptop-only minimum, 46 by 24 inches for a monitor plus laptop, and 58 by 28 inches for a dual-monitor setup. It also calls for 36 inches of chair clearance behind the desk.[5] That last number is the one that makes tiny desks less charming in real life. If the chair cannot pull back, the desk is not compact; it is just in the way.
A 48-inch table already in the apartment deserves a serious look before any new desk purchase. It is wider than the 46-inch monitor-plus-laptop minimum, and if it has enough depth, stability, and a clampable edge, it may do the job better than a new “small-space” desk. The budget then goes toward the chair, screen-height fix, keyboard, mouse, and maybe a monitor instead of creating another piece of furniture to store, return, or work around.
The five-minute desk test
- Measure the top: 36 by 22 inches is the laptop-only floor; 46 by 24 inches is the safer monitor-plus-laptop floor; 58 by 28 inches is where dual monitors start to make physical sense.[5]
- Pull the chair back 36 inches. If it hits a bed, sofa, radiator, closet door, or walkway, the setup will annoy you daily.[5]
- Check the back edge. A clamp monitor arm needs a surface edge it can actually grip; thick lips, drawers, glass tops, and rounded edges can ruin the plan.
- Place the keyboard where your hands naturally land. If the surface is too shallow after the laptop and monitor are in place, a clamp arm may reclaim enough depth to make the existing surface usable.[1]
- If no surface passes, then buy a desk. At that point, the desk is solving a measured problem, not acting as proof that you have an office.
What the $500 build looks like in a small rental
The cleanest version reuses an existing table and spends the budget on the parts that change the workday: chair, laptop stand or monitor arm, external keyboard and mouse, and possibly a monitor. That is the build most likely to stay under control in a studio because it avoids adding furniture before the workstation proves it needs furniture.
| Scenario | Best first move | Where the budget pressure lands |
|---|---|---|
| You already have a stable 48-inch table | Keep it, then fix chair and screen height | You can spend more of the $400–$530 band on the chair, arm or stand, keyboard, mouse, and monitor |
| You have only a shallow table or console | Test a clamp arm or laptop stand before replacing the surface | Depth matters more than width once the keyboard, screen, and viewing distance are set |
| You have no usable surface | Buy the desk after confirming the footprint and chair clearance | The desk may push the build toward the upper end of the range |
| You want dual monitors | Measure for a 58 by 28 inch surface first | The physical footprint and dock needs can break the budget faster than the second screen itself |
An external monitor is worth considering when the work actually benefits from it: spreadsheets, side-by-side documents, design reviews, coding, or heavy calendar-and-chat juggling. It is less urgent if the laptop is used mostly for calls, email, and a browser tab or two. In a $500 plan, the monitor should earn its surface area.
Connectivity is the quiet catch. Some laptops can run a monitor, keyboard, mouse, power, and webcam with little fuss; others need a dock or hub to avoid daily cable wrestling. If the setup moves toward dual displays or a single-cable desk, compare dock cost before buying the second screen. FlowDesk’s USB4 dock comparison for dual-monitor productivity is the more relevant rabbit hole once the monitor count, ports, and power delivery needs are known.
What to leave out until the workstation works
Remote workers do want comfort equipment. In Nulab’s June 2020 self-reported survey of 856 respondents, the most-wanted items included back pillows at 32.9%, standing desks at 31.4%, and blue-light glasses at 26.6%.[6] That is useful directional color, especially because it shows people were thinking about physical comfort rather than only decor. It is not a reason to spend the first $150 on a standing converter while the laptop screen is still low and the chair is still bad.
A 2026 CoworkingCafe survey of 1,140 respondents also suggests that many remote setups still have friction: only 22% said their setup needed no improvement, while 49% pointed to household distractions and 16% cited lack of a proper workspace.[7] Those numbers do not prescribe a product list. They do explain why the small-apartment setup has to be boringly practical: the room is already competing with the work.
- Skip a new desk if an existing 48-inch table passes the depth, stability, clamp, and clearance tests.
- Skip the standing desk upgrade unless sitting posture, monitor height, and keyboard position are already solved.
- Skip blue-light glasses as an ergonomic substitute. They do not move the screen to eye level or fix reach.
- Skip decorative storage until the cable path, power strip location, and daily device parking spot are obvious.
Cleanup comes last, not because it is unimportant
Cable management matters more in a small apartment because the office may also be the dining area, bedroom corner, or living room wall. It still belongs at the end. Until the chair, screen, keyboard, mouse, and surface are in their final places, every cable tie is temporary theater.
Once the layout is set, add the dull pieces: a power strip mounted where it can be reached, a few reusable cable ties, a tray or sleeve for laptop charging, and a mat if the chair needs to roll without chewing up the floor. If the workstation includes several always-plugged devices, FlowDesk’s guide to reducing phantom energy cost is worth checking after the hardware layout is stable.
Measure the surface, check the 36-inch chair clearance, raise the screen, separate the keyboard and mouse from the laptop, and reuse the 48-inch table if it works. Spend what remains only after those decisions are no longer guesses.
References
- Complete Home Office Setup Under $500 (2026) | 5 Picks — WorkstationSetup, April 2026
- Best Home Office Setup Under $500 (2026 Guide) — DeskDNA
- Computer Workstations - Monitors — OSHA eTools
- Office Ergonomics - Positioning the Monitor — CCOHS
- Home Office Desk Setup Ideas for Small Spaces (2026) — Keelan Scott, 2026
- Adjusting to remote work during the COVID-19 crises — Nulab, June 2020
- The 2026 Remote Work Well-Being Survey — CoworkingCafe, 2026
Comments
Join the discussion with an anonymous comment.