OneNote → Obsidian
How to Migrate from OneNote to Obsidian: Choose the Right Tool and Move Your Notes Safely
A complete, step-by-step guide for moving your Microsoft OneNote notebooks to Obsidian — covering three migration tools (Obsidian Importer, OneNote MD Exporter, and ConvertOneNote2MarkDown), a decision table to help you pick the right one, and post-migration cleanup steps to get your vault ready to use.
⚠ Data loss risk: Medium — some formatting or attachments may not transfer.
Steps last verified: 2026-06-06
By Editorial Team
- OneNote
- Obsidian
- migration
- data-portability
- export
- import
- PKM
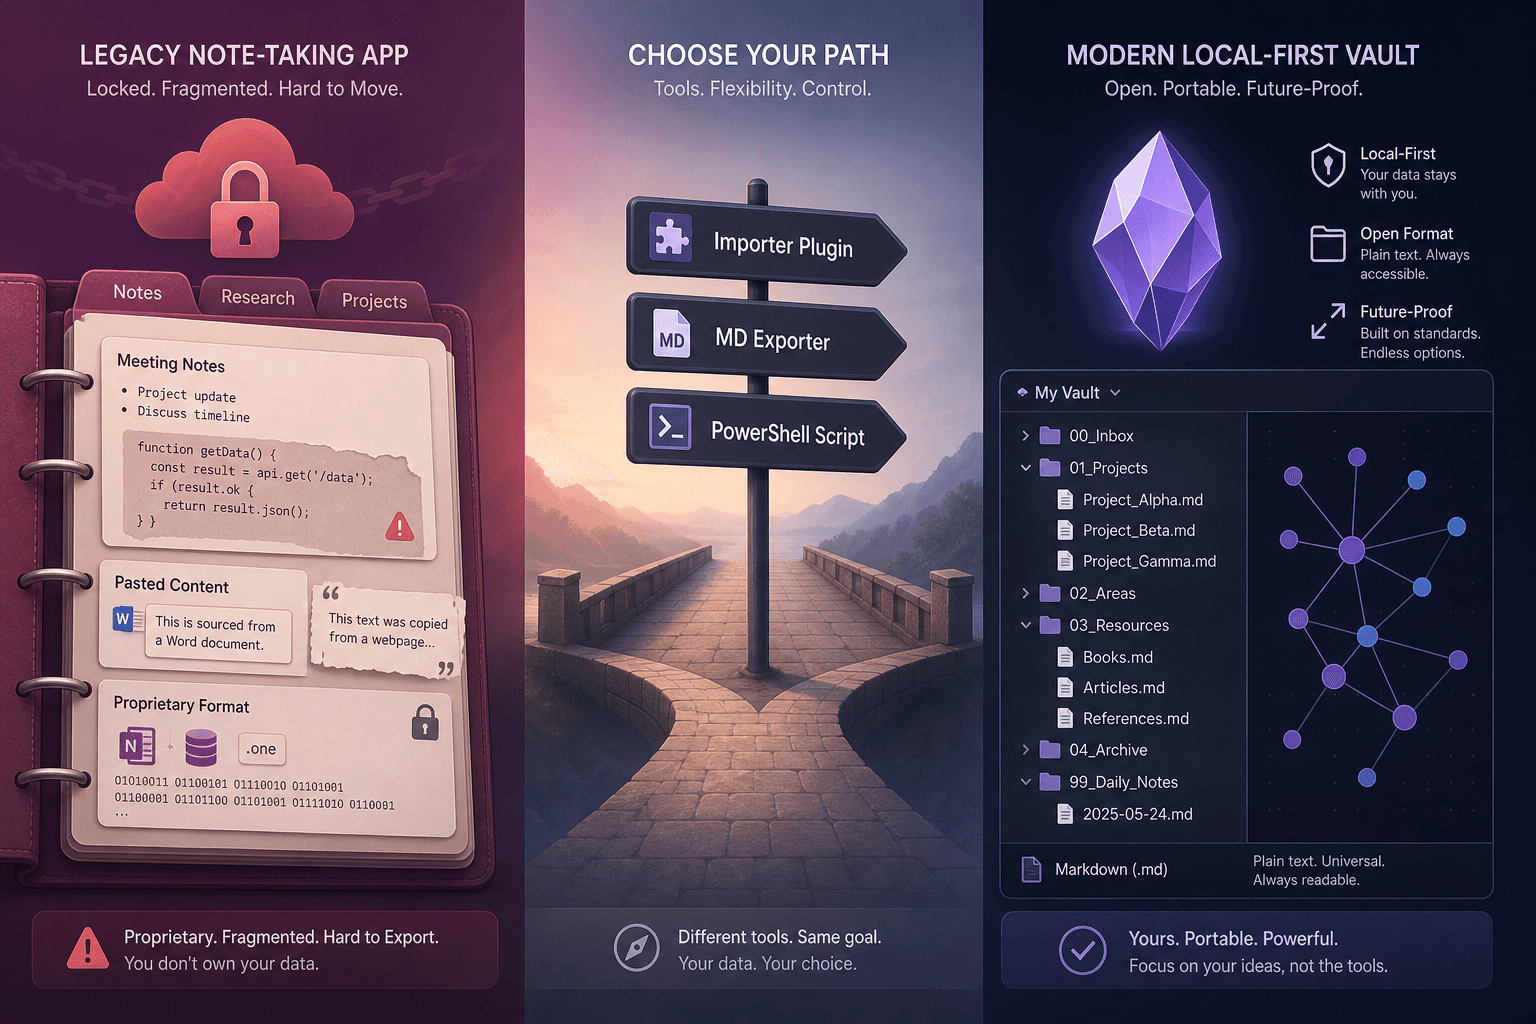
Why People Leave OneNote for Obsidian
OneNote is a capable tool for casual note-taking, but it creates real friction for knowledge workers who need code blocks, reliable search, and long-term data ownership. The most common pain points that push users toward Obsidian are:
- No native code block formatting — pasting code produces inconsistent, hard-to-read results.
- No Find and Replace on mobile. Microsoft's own workaround is to copy content into Word, perform the replacement there, and paste back.
- Proprietary format lock-in — your notes live in a Microsoft-controlled binary or cloud format, not as portable files you own.
- Chaotic paste behavior — web-clipped content and copied text frequently arrive with inconsistent fonts, sizes, and spacing that require manual cleanup.
- No backlinks or graph view — there is no way to discover connections between notes or navigate by relationship.
Obsidian addresses each of these directly. Notes are plain .md files stored on your device — you own them completely. The editor handles code blocks, regex search, and bidirectional linking natively. The mobile apps offer full feature parity with desktop, including regex Find and Replace. The graph view surfaces connections across your entire vault that would be invisible in a folder-based system.
The tradeoff is real: Obsidian has a steeper initial setup curve, no built-in handwriting support, and requires deliberate choices about sync. This guide is focused entirely on the migration itself — getting your notes out of OneNote and into a working Obsidian vault.
Before You Start: Pre-Migration Checklist
Work through these preparation steps in order. Skipping any of them is the most common cause of incomplete or failed migrations.
- Sync all notebooks to OneDrive. Open OneNote, right-click each notebook in the left panel, and choose Sync. Wait until all notebooks show a green checkmark. This is especially important for the PowerShell method, which needs notebooks accessible via the cloud.
- Download all files and images. Go to File → Options → Sync and enable Download all files and images. Without this step, embedded attachments and images may not be accessible to export tools.
- Unlock and remove all password-protected sections. Every migration tool skips locked sections silently. Open each protected section, enter the password, then right-click the section tab and choose Password Protect This Section → Remove Password. Do this for every protected section across all notebooks.
- Create a full backup. In OneNote, go to File → Export → Notebook and export as
.onepkgor export individual sections as.onefiles. Store these backups somewhere separate from your OneDrive before proceeding. - Install the desktop version of OneNote. The Windows Store (UWP) version of OneNote is not supported by any of the three migration tools. You need the classic desktop application, available as part of Microsoft 365 or as a standalone download. If you are unsure which version you have, check whether it shows a File menu — the Store version does not.
- (Large collections only) Flatten deeply nested section groups. If your notebooks contain section groups nested more than four levels deep, rename the child sections to preserve context and then move them up to a shallower level. The PowerShell script in particular can produce unexpected output with very deep hierarchies.
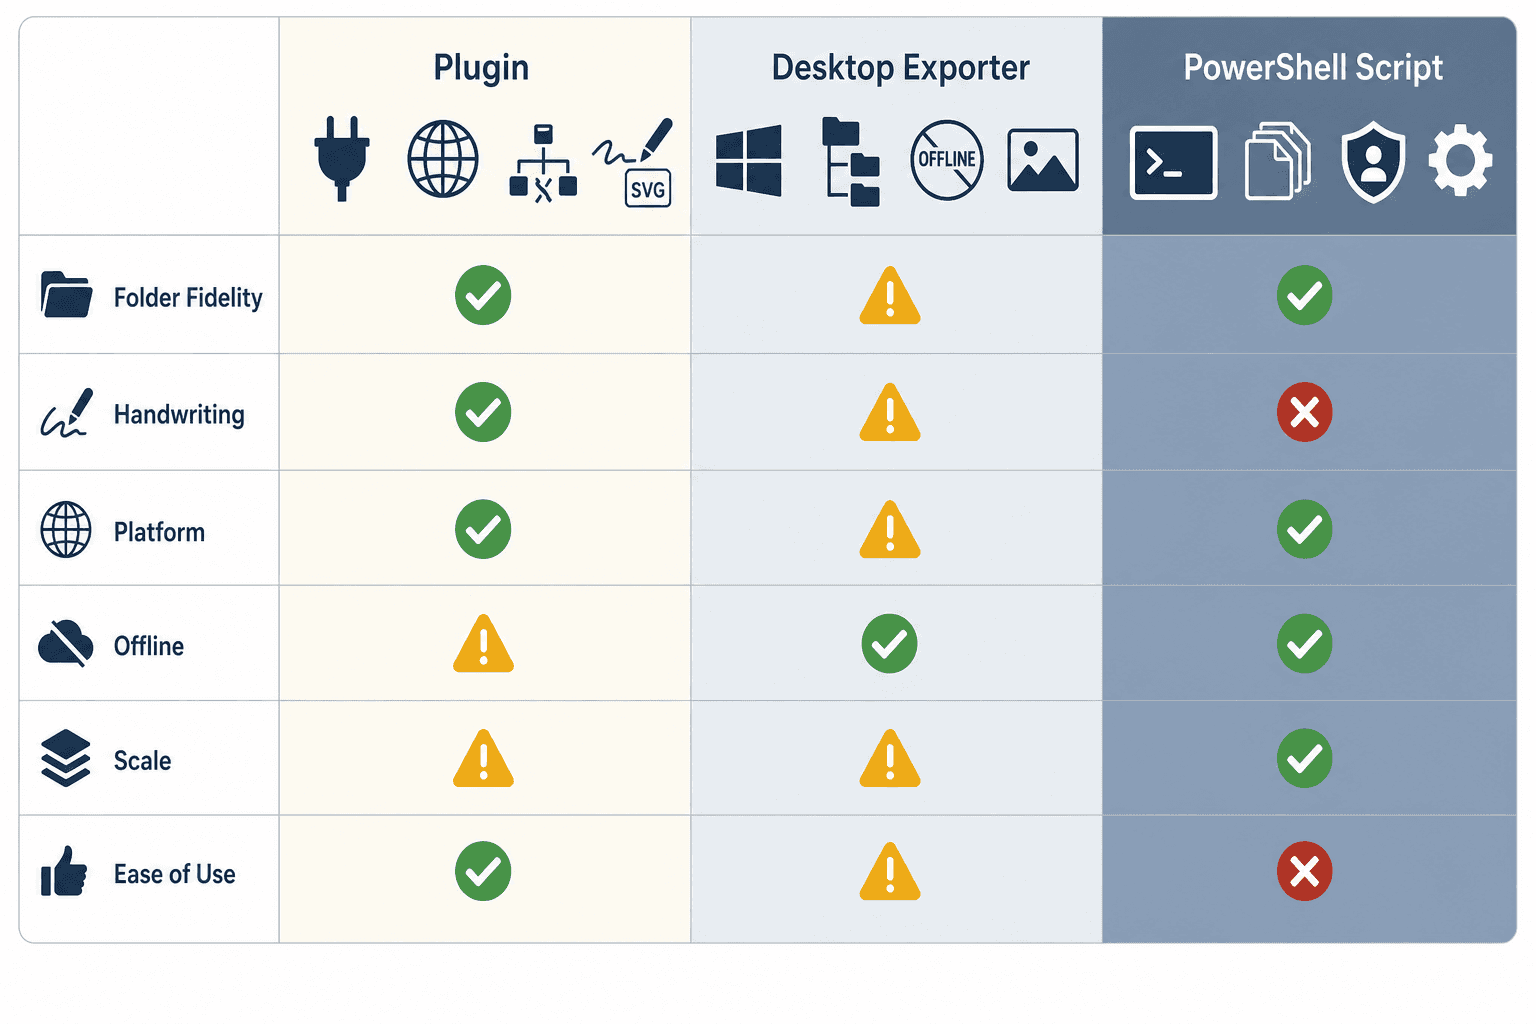
Which Tool Should You Use? A Three-Way Comparison
Three tools handle the OneNote-to-Obsidian migration path, and they make very different tradeoffs. Reading the wrong method section first is the most common reason migrations fail or require extensive rework. Use this table to identify your tool before reading any further.
| Criterion | Obsidian Importer Plugin | OneNote MD Exporter | ConvertOneNote2MarkDown (PowerShell) |
|---|---|---|---|
| Folder structure fidelity | ❌ Flattens everything into one folder | ✅ Preserves section-group hierarchy | ✅ Preserves section-group hierarchy |
| Handwriting / ink support | ✅ Converts InkML to SVG vector files | ⚠️ Flattens drawings to raster images | ❌ Lost in .md output (PDF export preserves layout) |
| Platform | ✅ Cross-platform (Mac, Windows, Linux) | ⚠️ Windows 10+ only | ⚠️ Windows 10+ only |
| Offline capability | ❌ Requires Microsoft account + internet | ✅ Fully offline after initial sync | ✅ Fully offline after initial sync |
| Scale (file count) | ⚠️ Rate-limited by Microsoft Graph API; best for smaller notebooks | ✅ Good for hundreds of pages | ✅ Tested at 2,000+ files |
| Ease of use | ✅ Easiest — GUI, no command line | ✅ Easy — prompts guide you, no typing | ❌ Advanced — requires config file editing and admin rights |
| Additional requirements | Microsoft account | Word 2013+, Pandoc | PowerShell 7.0.x, Word 2016+, Pandoc 2.11.2+, admin rights |
As a quick decision guide:
- Use the Obsidian Importer if you are on Mac or Linux, or if you have handwritten notes you want to preserve as SVG.
- Use OneNote MD Exporter if you are on Windows, your notebooks have meaningful section-group hierarchy, and you want a straightforward process without command-line work.
- Use ConvertOneNote2MarkDown if you are on Windows with 2,000+ pages, need fine-grained control over output format, and are comfortable editing a configuration file and running PowerShell as Administrator.
Method A: Obsidian Importer Plugin (Easiest, Cross-Platform)
The Obsidian Importer is a community plugin that connects to Microsoft's Graph API to pull notes directly from your OneDrive-synced OneNote account. It is the only method that works on Mac and Linux, and the only one that converts InkML handwriting to SVG vector files.
Installation and Setup
- Open Obsidian and go to Settings → Community Plugins. Disable Safe Mode if prompted.
- Search for "Importer" and install the plugin by the Obsidian team. Enable it.
- Open the Importer (ribbon icon or Command Palette → Open Importer). Select OneNote as the source.
- Sign in with your Microsoft account. Grant the requested permissions to access your OneNote notebooks.
- Select the notebook you want to import. Create one new Obsidian vault per notebook before importing — this isolates any errors and makes cleanup easier. Merging vaults later is straightforward via file copy.
- Enable the option to save already-imported note IDs. This allows you to resume a paused import without creating duplicates.
- Click Import and monitor progress. The importer processes pages sequentially.
Known Issues and Workarounds
The Obsidian Importer has two significant failure modes for large notebooks that are not clearly communicated in the UI.
Rate limiting. Microsoft's Graph API enforces strict rate limits. When hit, the importer displays the message:
Microsoft OneNote has limited how fast notes can be imported, please try again in 30 minutes to continue importing.
Users report this message can persist even after waiting over an hour. The most reliable workaround is to split large notebooks into smaller ones before importing. Use the older OneNote for Windows desktop app (not the Store version) to move sections into new, smaller notebooks, then import each one separately.
504 Gateway Timeout errors. On very large sections, the importer may time out after five retry attempts and silently skip the affected pages. This failure does not appear in the importer UI — it is only visible in the browser developer console (F12 → Console). If you suspect missing notes after import, check the console output during the next run.
Method B: OneNote MD Exporter (Best Folder Fidelity, Windows Only)
OneNote MD Exporter (by alxnbl, ~1.5k GitHub stars) is the best choice for most Windows users who need to preserve the folder hierarchy of their notebooks. It works entirely offline, produces a clean output structure, and requires no command-line typing despite being a console application — the tool walks you through the process with on-screen prompts.
Requirements
- Windows 10 or later
- OneNote 2013 or later (desktop/classic version — not the Windows Store app)
- Microsoft Word 2013 or later (used behind the scenes for DOCX conversion)
- Pandoc (free, open-source document converter — download from pandoc.org)
Steps
- Download the latest release ZIP from the OneNote MD Exporter GitHub repository. Extract it to a folder of your choice.
- Run OneNoteMdExporter.exe. The tool opens a console window and walks you through selecting a notebook.
- When prompted for the output format, select the Obsidian wikilinks option. This produces [[Page Title|Display Text]] link syntax compatible with Obsidian.
- Wait for the export to complete. The tool exports each page as a DOCX file first, then converts it to Markdown using Pandoc. Large notebooks may take several minutes.
- Review the output folder. Sections become folders, pages become .md files, and media is placed in a Resources folder at the same level as each section folder.
Limitations
- Handwriting is lost entirely — ink content does not survive the DOCX conversion step.
- Drawings are flattened to raster images, not vector graphics.
- Images embedded inside tables may not export correctly.
- Password-protected sections are silently skipped unless you unlocked them during the pre-migration checklist.
- Text tags (OneNote's built-in tag system) do not carry over.
Method C: ConvertOneNote2MarkDown PowerShell Script (Advanced, Large Collections)
Requirements
- Windows 10 or later
- PowerShell 5.x or Core 6.x–7.0.x. PowerShell 7.1 and later are explicitly unsupported — Microsoft removed Win32 GAC Assembly support in 7.1, which the script needs to call OneNote's desktop APIs. To install 7.0.13 without overriding your existing version: download PowerShell-7.0.13-win-x64.zip, extract to
C:\PowerShell-7.0.13-win-x64, and run pwsh.exe from that folder. - OneNote 2016 or later (desktop version, not Store app)
- Microsoft Word 2016 or later
- Pandoc 2.11.2 or later
- Administrator rights — both PowerShell and OneNote must run under the same user with admin privileges
Key Configuration Settings
After cloning or downloading the ConvertOneNote2MarkDown repository, open the configuration file and set the following values before running:
# Output destination — use a short, clean absolute path to avoid long-path issues
$notesdestpath = 'C:\temp\notes'

# Process one notebook at a time to isolate errors
$targetNotebook = 'My Notebook Name'

# Use DOCX intermediate format (faster than XML)
$usedocx = 2

# Raise the filename/folder length limit to handle long OneNote page titles
$mdFileNameAndFolderNameMaxLength = 200

# Place media in a separate folder per hierarchy level (better for Obsidian)
$medialocation = 2

# Obsidian-compatible Pandoc conversion string
$conversion = 'markdown-simple_tables-multiline_tables-grid_tables+pipe_tables-bracketed_spans+native_spans+startnum'

# Optional: export a PDF alongside .md to preserve ink/handwriting layout
$exportPdf = 2
Running the Script
- Open PowerShell 7.0.x as Administrator (right-click → Run as Administrator).
- Navigate to the script directory and run it. The script opens OneNote and Word in the background and begins processing pages.
- Process one notebook at a time using $targetNotebook. Running the full account at once makes errors harder to diagnose.
- Between re-runs, clear the .md and media output files to avoid duplicates. Keep the docx folder — it prevents the script from regenerating DOCX files it has already created, which saves significant time.
Fixing Corrupted Pages
If the script aborts with a "The remote procedure call failed" error, a corrupted page is causing it. To fix:
- In OneNote, right-click the problem page and choose Move or Copy.
- Move it to a new, temporary section.
- Delete the original page from its original location.
- Re-run the script. It will skip the problem page and continue.
- Investigate the moved page separately — it may need to be recreated manually.
Moving Your Exported Files into Obsidian
Once your export is complete, getting the files into Obsidian is straightforward.
- Open Obsidian and create a new vault. Give it the same name as the OneNote notebook you exported. Do this for each notebook — one vault per notebook.
- Open your file manager and copy the entire exported folder into the vault directory (the folder Obsidian created when you made the vault).
- Switch back to Obsidian. It automatically indexes all .md files in the vault directory. Your notes will appear in the file explorer panel within seconds.
- Before doing anything else, create a sandbox vault and copy a subset of your exported files into it. Verify that links, images, and formatting look correct before merging into your main vault.
If you want to consolidate multiple notebooks into a single vault later, simply copy the folder contents from each per-notebook vault into a shared vault directory. Obsidian will re-index everything automatically. There is no merge tool required.
Post-Migration Cleanup
Regardless of which migration tool you used, your exported Markdown files will contain residual artifacts from OneNote's internal formatting. Cleanup is almost always necessary before your vault is pleasant to use.
Linter Plugin Rules
Install the Linter community plugin in Obsidian and enable the following rules:
- Paragraphs blank-line rule — ensures one blank line before and after every paragraph, fixing the run-on paragraph formatting that OneNote exports often produce.
- Convert yellow highlight spans — converts OneNote's HTML span-based highlights to standard Markdown highlight syntax (==highlighted text==).
- Eliminate remaining span tags — strips any leftover generic HTML span elements that did not match the highlight pattern.
Regex Find and Replace Patterns
Install the Regex Find/Replace community plugin in Obsidian and run these patterns across your vault. Alternatively, use VS Code's Replace in Files (Ctrl+Shift+H with regex mode enabled) before opening the vault in Obsidian — VS Code handles bulk replacements faster across large file sets.
Remove image dimension metadata strings (e.g., {width='3.85in' height='1.77in'}):
Find:    \{width=[^\}]+\}
Replace: (empty)
Remove residual HTML span tags:
Find:    <span[^>]*>(.*?)<\/span>
Replace: $1
Collapse excessive blank lines (three or more consecutive newlines):
Find:    \n\n\n
Replace: (empty)
Remove auto-generated Created/Modified timestamp headers that some export tools insert at the top of each file:
Find:    ^(Created|Modified): .+\n
Replace: (empty)Syncing Your Obsidian Vault After Migration
Obsidian stores notes as local files, so sync is not automatic — you need to choose a method. Your options depend on which platforms you use and whether you want to pay for a managed service.
- Obsidian Sync. The official paid sync service. Works on all platforms including iOS and Android. Includes version history and end-to-end encryption. Verify current pricing at obsidian.md/pricing before committing — pricing has changed since early community reports.
- iCloud Drive. Free for Apple ecosystem users. Works seamlessly on macOS and iOS. Store your vault inside the iCloud Drive folder and Obsidian on iOS will find it automatically. This is the simplest option for users who only work within Apple devices.
- Dropbox or Google Drive. Free tiers available. Works well for desktop sync between Mac and Windows. However, neither Dropbox nor Google Drive provides full functionality with the Obsidian iOS app — on iOS, you are limited to iCloud Drive or Obsidian Sync.
- Synology Drive. A self-hosted option for users with a Synology NAS. Works on desktop (Mac and Windows). Like Dropbox and Google Drive, it is not available as a sync provider for the Obsidian iOS app.
Troubleshooting: Common Errors and Fixes
Obsidian Importer: Rate Limiting Message
If you see "Microsoft OneNote has limited how fast notes can be imported, please try again in 30 minutes," the Microsoft Graph API has throttled your import. Waiting and retrying does not always resolve it.
Workaround: Split the affected notebook into smaller notebooks (10–20 sections each) using the classic OneNote for Windows app before importing. Import each smaller notebook separately. The saved imported IDs setting prevents duplicates across runs.
Obsidian Importer: 504 Gateway Timeout and Silent Skips
504 errors on large sections cause the importer to retry five times and then silently skip the affected pages. The importer UI does not report this failure. To detect it, open the browser developer console (F12 → Console tab) while the import is running and watch for timeout errors. If you find them, split the oversized section into smaller sections in OneNote and re-run.
Missing Images After Export
If images appear as broken links in your exported notes, check the media folder created by the export tool. For OneNote MD Exporter, look for a Resources folder at the same level as the section folder. For ConvertOneNote2MarkDown with $medialocation=2, each hierarchy level has its own media folder. If the images are present in the folder but not displaying, the link path in the .md file may be incorrect — check whether the path is relative or absolute and adjust accordingly.
ConvertOneNote2MarkDown: PowerShell 7.1+ Error
If you run the script on PowerShell 7.1 or later, you will receive a COM/HRESULT error when the script tries to load the OneNote API assembly. This is not a bug you can work around — it is a hard incompatibility caused by Microsoft removing Win32 GAC Assembly support in PowerShell 7.1. Download PowerShell 7.0.13 as a side-by-side installation (extract the ZIP to a separate folder, run its pwsh.exe directly) and use that version exclusively for this script.
ConvertOneNote2MarkDown: Corrupted Pages Abort the Script
A "The remote procedure call failed" error means the script hit a page OneNote cannot read correctly. Use the move-and-delete fix described in Method C: move the problem page to a temporary section, delete the original, and re-run. The script will skip the moved page and process the rest of the notebook. Investigate the moved page separately once the migration is otherwise complete.
Password-Protected Sections Not Exported
All three tools silently skip password-protected sections. If notes are missing after migration, return to OneNote and check whether any sections still have a lock icon. Unlock them (right-click the section tab → Password Protect This Section → Remove Password), then re-run the export for those sections only.
Comments
Join the discussion with an anonymous comment.